How to Install the Facebook SDK into a React Native Android or iOS App

So I made this snarky tweet at 4 a.m. This is my peace offering.
If you’re a native Android or iOS developer and are already familiar with their respective ecosystems, this blog post probably won’t do you much good.
But if you’re a JavaScript developer who doesn’t know what an Info.plist or a strings.xml file is — and you’d sooner wait 45 minutes for npm install to finish than open up Xcode — this guide is for you.
Note that this is a just an excerpt from my much more comprehensive React.js Program’s React Native course.
Let’s assume you’re reading this because you’re more concerned with “how” than “why.” So, unlike my typical posts, this one will be heavy on implementation details and light on understanding the abstractions.
I’m also assuming you’re using React Native .29 or above. If you’re using e version older than that, well, you have bigger problems than getting this tutorial to work.
We’re going to use Facebook’s “react-native-fbsdk” library, which is just a wrapper around the Facebook SDKs for Android and iOS. It will give us access to Facebook login, sharing, graph requests, and app events.
In your terminal run:
npm install --save react-native-fbsdk
Next up, we need to do some linking.
Again, in your terminal run:
react-native link
Now let’s register a new app with Facebook.
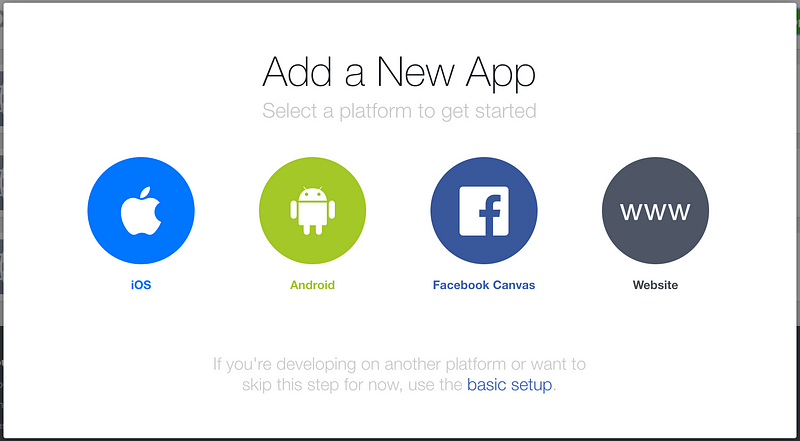
Header over to Facebook’s developers site and “Add a New App”.
When you see this screen select iOS…
…type in the name of your project, then hit the main submit button which at the time of this writing says “Create new Facebook App Id.” Be sure to enter in a contact email address and select a Category.
If you’re lucky, at this point you’ll get a fun little game about matching Tigers or watches. Facebook is just full of fun micro experiences 🙃.
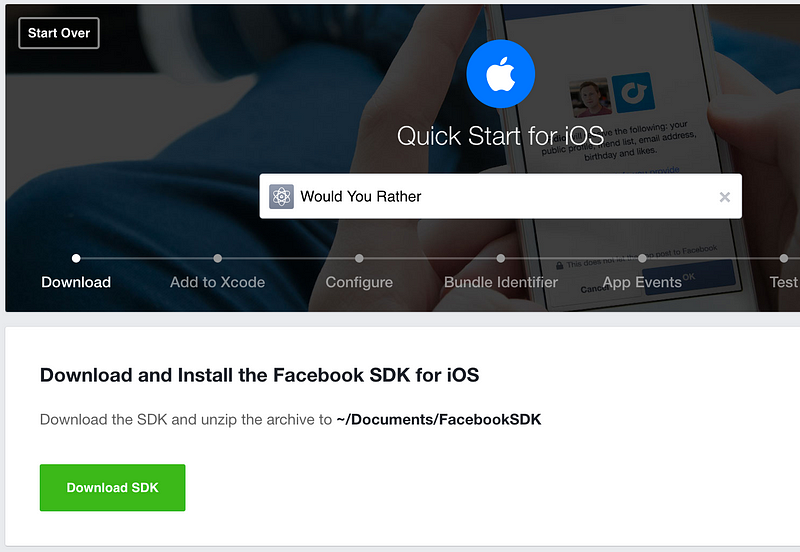
Once at this view, you’re going to do exactly what is says, and download the SDK to your ~/Documents folder.
Coming from the web, this is going to feel super strange. But it’s the only way I could get the SDK tied up properly without having to resort to using Pods.
At this point you should have successfully installed “react-native-fbsdk” and created a new iOS Facebook app. The FacebookSDK should be located in the ~/Documents folder of your computer.
Now for the moment we’ve been training for.
Go to your project and double click on YourAppName.xcodeproj project to open it up in Xcode.
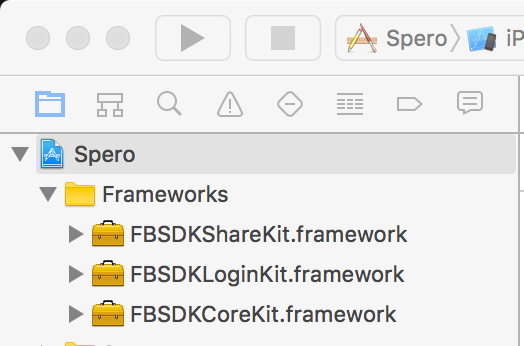
Once you have your project opened in Xcode, right click on your project’s name in the left sidebar and select “New Group” and type in “Frameworks”.
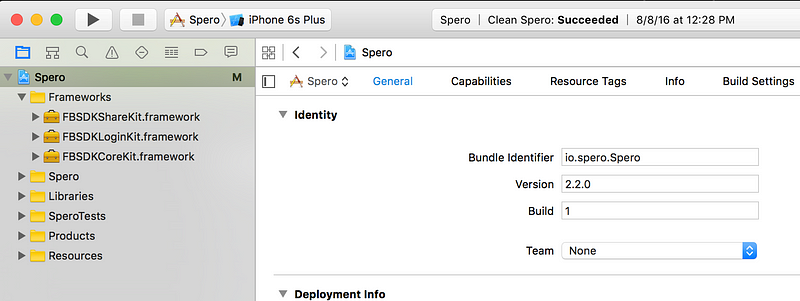
Then open up your ~Documents/FacebookSDK folder from earlier and dragFBSDKCoreKit.Framework, FBSDKLoginKit.Framework,FBSDKShareKit.Framework into the Frameworks group you just created. The end result should look like this,
Now, click on the “Build Settings” tag (pictured below) then search for “Framework Search Paths”. Once you find it add “~/Documents/FacebookSDK”. (To get the little popup box double click on the highlighted line right below the word “Spero” then click the + button to add the text).
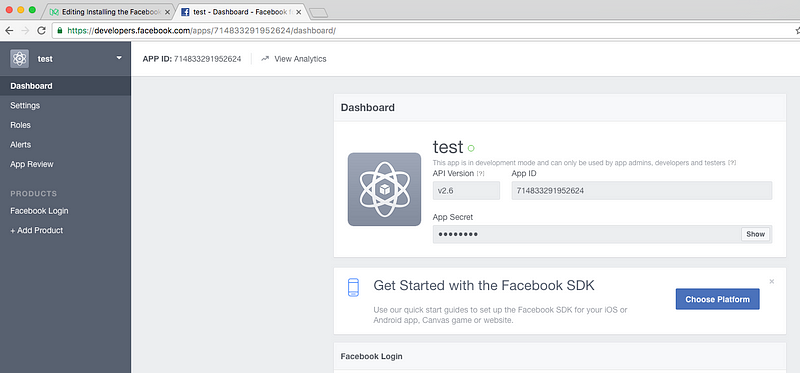
Now we need to dive into our Info.plist. For this step we’ll need our Facebook App ID number. To get this, head back over to your Facebook developer dashboard and it will be on the home screen under “App ID”.
Now open up your app in your preferred IDE and then open up the “Info.plist” file located in “ios/YourAppName”
Now, right below this strange line
<string>????</string>
add this code,
<key>CFBundleURLTypes</key>
 <array>
  <dict>
   <key>CFBundleURLSchemes</key>
   <array>
    <string>fbYOUR-APP-ID</string>
   </array>
  </dict>
 </array>
 <key>FacebookAppID</key>
 <string>YOUR-APP-ID</string>
 <key>FacebookDisplayName</key>
 <string>YOUR-FACEBOOK-DISPLAY-NAME</string>
 <key>LSApplicationQueriesSchemes</key>
 <array>
  <string>fbapi</string>
  <string>fb-messenger-api</string>
  <string>fbauth2</string>
  <string>fbshareextension</string>
 </array>
Be sure to swap out “YOUR-APP-ID” with your Facebook APP Id and “YOUR-FACEBOOK-DISPLAY-NAME” with, well, your Facebook app display name.
Now head back to Xcode and grab your “Bundle Identifier” number located in the “General” tab.
Once you have that, copy it to your clipboard.
Now head over to your Facebook Developer dashboard again and click on “Settings” -> “Basic” -> “+Add Platform” and select “iOS”.
Once you select iOS you’ll see a place to enter in your “Bundle ID” you just got from Xcode. Do that and be sure to select “Save Changes”.
Now head back to your text editor and open up “ios/PROJECT-NAME/AppDelegate.m”
Right above “@implementation AppDelegate” you need to import FBSDKCoreKit. Go ahead and add
#import <FBSDKCoreKit/FBSDKCoreKit.h>
Now right above the “@end” line (and after the didFinishLaunchingWithOptions block) add this code,
- (void)applicationDidBecomeActive:(UIApplication *)application {
  [FBSDKAppEvents activateApp];
}
- (BOOL)application:(UIApplication *)application
            openURL:(NSURL *)url
  sourceApplication:(NSString *)sourceApplication
         annotation:(id)annotation {
  return [[FBSDKApplicationDelegate sharedInstance] application:application
                                                         openURL:url
                                               sourceApplication:sourceApplication
                                                      annotation:annotation];
}
So your final AppDelegate.m file will look something like this (changes inbold),
#import "AppDelegate.h"
#import "RCTBundleURLProvider.h"
#import "RCTRootView.h"
#import <FBSDKCoreKit/FBSDKCoreKit.h>
@implementation AppDelegate
- (BOOL)application:(UIApplication *)application didFinishLaunchingWithOptions:(NSDictionary *)launchOptions
{
  NSURL *jsCodeLocation;
jsCodeLocation = [[RCTBundleURLProvider sharedSettings] jsBundleURLForBundleRoot:@"index.ios" fallbackResource:nil];
RCTRootView *rootView = [[RCTRootView alloc] initWithBundleURL:jsCodeLocation
                                                      moduleName:@"Spero"
                                               initialProperties:nil
                                                   launchOptions:launchOptions];
  rootView.backgroundColor = [[UIColor alloc] initWithRed:1.0f green:1.0f blue:1.0f alpha:1];
self.window = [[UIWindow alloc] initWithFrame:[UIScreen mainScreen].bounds];
  UIViewController *rootViewController = [UIViewController new];
  rootViewController.view = rootView;
  self.window.rootViewController = rootViewController;
  [self.window makeKeyAndVisible];
  return YES;
}
- (void)applicationDidBecomeActive:(UIApplication *)application {
  [FBSDKAppEvents activateApp];
}
- (BOOL)application:(UIApplication *)application
            openURL:(NSURL *)url
  sourceApplication:(NSString *)sourceApplication
         annotation:(id)annotation {
  return [[FBSDKApplicationDelegate sharedInstance] application:application
                                                         openURL:url
                                               sourceApplication:sourceApplication
                                                      annotation:annotation];
}
@end
Good news is that’s all you need to do for iOS. If you’re not building an Android app as well, you’re all set. However, if you are (or if you ever plan on) building an Android app as well, continue on.
Now in your text editor head over to your “MainApplication.java” file located at “android/app/src/main/java/com/<project name>/”
After all of the other imports in MainApplication.java, add the following imports.
import com.facebook.CallbackManager;
import com.facebook.FacebookSdk;
import com.facebook.reactnative.androidsdk.FBSDKPackage;
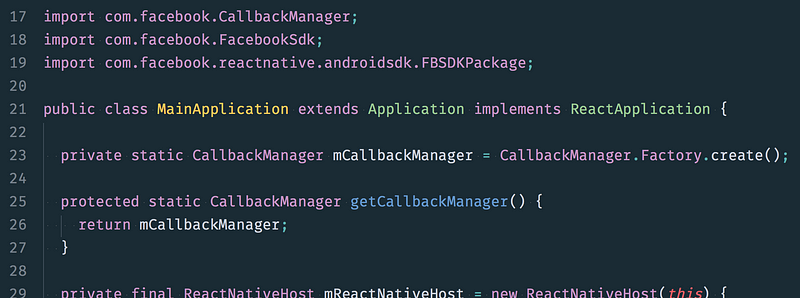
Now inside the MainApplication class, add the following properties,
private static CallbackManager mCallbackManager = CallbackManager.Factory.create();
protected static CallbackManager getCallbackManager() {
    return mCallbackManager;
}
Now go ahead and head to the bottom of your MainApplication class and add this Override to the class.
@Override
public void onCreate() {
  super.onCreate();
  FacebookSdk.sdkInitialize(getApplicationContext());
}
Now the last step in this file is you need to include the FBSDKPackage to your Array of React packages. Find the code that looks like this,
@Override
protected List<ReactPackage> getPackages() {
   return Arrays.<ReactPackage>asList(
    new MainReactPackage()
   );
}
and go ahead and add “new FBSDKPackage(mCallbackManager)” as a new list item on that array.
Once you’re finished, your code should look similar to this (changes are bold)
package com.spero;
import android.app.Application;
import android.util.Log;
import com.facebook.react.ReactApplication;
import com.oblador.vectoricons.VectorIconsPackage;
import com.facebook.reactnative.androidsdk.FBSDKPackage;
import com.facebook.react.ReactInstanceManager;
import com.facebook.react.ReactNativeHost;
import com.facebook.react.ReactPackage;
import com.facebook.react.shell.MainReactPackage;
import java.util.Arrays;
import java.util.List;
import com.facebook.CallbackManager;
import com.facebook.FacebookSdk;
import com.facebook.reactnative.androidsdk.FBSDKPackage;
public class MainApplication extends Application implements ReactApplication {
private static CallbackManager mCallbackManager = CallbackManager.Factory.create();
protected static CallbackManager getCallbackManager() {
    return mCallbackManager;
  }
private final ReactNativeHost mReactNativeHost = new ReactNativeHost(this) {
    @Override
    protected boolean getUseDeveloperSupport() {
      return BuildConfig.DEBUG;
    }
@Override
    protected List<ReactPackage> getPackages() {
      return Arrays.<ReactPackage>asList(
          new MainReactPackage(),
          new FBSDKPackage(mCallbackManager)
      );
    }
  };
@Override
  public ReactNativeHost getReactNativeHost() {
      return mReactNativeHost;
  }
@Override
  public void onCreate() {
    super.onCreate();
    FacebookSdk.sdkInitialize(getApplicationContext());
  }
}
Alright we’re really close. Now head over to MainActivity.java (located at “android/app/src/main/java/com/<project name>/” and do the following,
First import android.content.Intent;
import android.content.Intent;
next, add this Override to your MainActivity class
@Override
public void onActivityResult(int requestCode, int resultCode, Intent data) {
        super.onActivityResult(requestCode, resultCode, data);
        MainApplication.getCallbackManager().onActivityResult(requestCode, resultCode, data);
    }
Your final code will look like this (changes in bold)
package com.spero;
import com.facebook.react.ReactActivity;
import android.content.Intent;
public class MainActivity extends ReactActivity {
    @Override
    public void onActivityResult(int requestCode, int resultCode, Intent data) {
        super.onActivityResult(requestCode, resultCode, data);
        MainApplication.getCallbackManager().onActivityResult(requestCode, resultCode, data);
    }
    @Override
    protected String getMainComponentName() {
        return "Spero";
    }
}
Take a few deep breaths. We’re just a few changes away from Valhalla.
Head over to “strings.xml” located at “android/app/src/main/res/values/strings.xml” and add a new string with your facebook app id.
<string name="facebook_app_id">YOUR_APP_ID</string>
Your strings.xml file will now look similar to this,
<resources>
    <string name="app_name">NameOfYourApp</string>
    <string name="facebook_app_id">YOUR-FACEBOOK-ID</string>
</resources>
One. More. File. To. Go.
Head over to AndroidManifest.xml located at “android/app/src/main” and add the following code right before </application>
<activity android:name="com.facebook.FacebookActivity"
        android:configChanges=
               "keyboard|keyboardHidden|screenLayout|screenSize|orientation"
        android:theme="@android:style/Theme.Translucent.NoTitleBar"
        android:label="@string/app_name" />
<meta-data android:name="com.facebook.sdk.ApplicationId" android:value="@string/facebook_app_id"/>
And with those 48 easy, fool-proofs steps, you’re good to go!
To see all these changes in a real project, dive into the changes files above in this project.





Post a Comment